
If you are a Mac OS X user who regularly works in programs like Adobe Premiere Pro, Final Cut Pro and Adobe Photoshop, you’ve probably encountered errors relating to a "scratch disk." The most common error is Photoshop’s refusal to open along with the message "scratch disk full."
If you’ve stumbled on this page because you’ve experienced this issue, you’re in luck: we’re going to show you how to easily resolve your scratch disk problem and, as a bonus, keep your Mac clean and performing at its best.
What is a scratch disk?
Before we highlight some solutions, it would be a good idea to have at least a general sense of what a scratch disk actually is. When you are using programs like Photoshop or Final Cut Pro, they require a working space called virtual memory or cache memory This is where temporary project files are stored and accessed.
For this guide we are focusing our laser sights on Photoshop. Afterall, it is the most common application. But rest assured that the info we cover will apply to most programs that rely on scratch drives.
When Photoshop can’t complete a task using your RAM, it uses hard drive space as temporary virtual memory instead. This hard drive space is called a scratch disk. Photoshop allows you to assign several scratch disks: that way, it has more space at its disposal.
When working with large images and lots of layers, Photoshop is secretly chewing up your Mac’s space by rapidly creating a mountain of project temp files.

It’s important to note that when you set up Photoshop, you will have the option to assign the scratch disks to the drive of your choice. We highly recommend not using your system drive, unless you have no other alternatives.
"Your scratch disks are full" - What does this mean?
The dreaded "scratch disk full" message is probably the reason why you've stumbled upon this guide. Mac users receive it when Photoshop (or any of the other programs) has used up all the space on the hard drive that has been assigned as scratch storage. This used up space is temporary and separate from your actual project file.
The problem is that Photoshop doesn't always get rid of these temporary files when they aren't needed anymore, which is more like a permanent problem if the user can't find a solution.
So how would you go about emptying your Mac scratch disk? Let's find out.
#1 - Clear your Photoshop cache
Photoshop has an in-built solution for deleting specific Photoshop caches. When these pesky caches aren’t removed automatically by the program, they can grow and take up a lot of space on your scratch disk.
To use this tool simply enter Photoshop in Mac and with an image open:
- Click the edit menu button.
- Hover your mouse over "purge" to reveal 4 different options.
- Undo, Clipboard, Histories, All. If an item is greyed out, that means it has already been deleted.
- Select the specific item you want to delete or select "all" to delete all of your caches.
- You will be warned that the purge cannot be undone, so make sure you don’t need a previous version of one of your projects and then click OK.
A good way to keep Photoshop cache from piling up is running regular disk cleanups. That's pretty easy to do with an app like CleanMyMac 3. It lets you clean up your whole Mac, but the best things is, it can remind you to do that before you get the "scratch disks are full" error again.
Here’s how you can schedule regular cleanings with CleanMyMac 3:
- Launch CleanMyMac 3
- Click CleanMyMac 3 icon in the menu bar and go to Preferences
- CleanMyMac 3 menu bar
- Select the Scheduler tab
- CleanMyMac 3 Scheduler
In Scheduler, go ahead and choose how often you want to be reminded — say, every week. When a cleaning is due, you'll get a pop-up reminder to launch CleanMyMac. Just let it do its thing. That way, you’ll never forget to clear Photoshop cache and tons of other system junk on your system.
You can download CleanMyMac 3 for free and see how it works.
#2 – Delete your temp files
When it comes to wasting space on your scratch disk, the worst culprit is often Photoshop's own temp files. If Photoshop isn't going to get rid of them, I guess you’re going to have to do the job yourself.
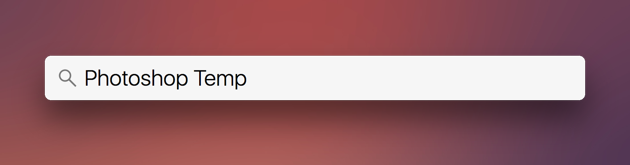
To find them you'll need to look for files that begin with "pst" and then a string of numbers followed by the file extension ".tmp". Do a search for "Photoshop Temp" with a space between the two words.
You can just search your scratch drive but to make sure everything is found, rather perform the search on the entire computer. It may take a couple of minutes for the search to complete, so pop into the kitchen for a quick snack while you wait.
When you return, you should have a long list of files. If your work is saved and the program is closed, you can safely delete these files and watch as your scratch disk space is reclaimed.
#3 – Clear your disk space
If you don't have another drive or don't want to buy one, then it's time to do some spring cleaning. Look at the drive contents to see if you can delete anything you don't need. Is there storage space that can be cleared? Usually there is, so go ahead and delete your old files and free up some space.
Alternatively, you can simply transfer files to external drives, DVDs or cloud storage solutions like Dropbox and iCloud.
Take a look at our How to Clean Your Startup Disk (10 Ways). Inside we have lots of practical advice for Mac OS X users who want a clean drive that performs well. Even if your scratch disk isn’t your startup drive, and we hope that is the case, there are many tips to help you spring clean like a pro.
Notice for Sierra users: Users of macOS Sierra might be aware that Apple has added new tools to "help" manage storage space. If you navigate to Apple Menu > About This Mac > Storage tab you will see the new Sierra bar graph.

If you click on "manage" you will be taken to the new tools. While there are some truly helpful elements, like using Optimized Storage to customize what email attachments download to your Mac, most of the tools just move junk from one place to another place.
Because a lot of these processes are automatic, Sierra users might not be aware of what the OS is doing on their behalf. If it sounds like a good idea to have macOS deciding what files to send to iCloud and what iTunes videos to remove, go for it.
For everyone else, we’d recommend turning off these tools or at least making sure you understand them fully before turning them on.
#4 – Change your scratch disk
It can be a hassle but if you keep an eye on the available space on your scratch disk, you can do something when the space is becoming limited. It’s also worth noting that problems don't just occur when the drive is completely full, hard drives should ideally never be above 85% capacity. Pass that threshold and problems will be just around the corner.
So, you've identified rapidly depleting free space on your Mac hard drive — now what? Well, it may be a good idea to change your scratch disk to another drive in your system (just not the system drive, as that is one drive you really don't want to slow down). If you don't have another drive, you could purchase one, with SSD being the best option for Mac OS X scratch disk purposes.
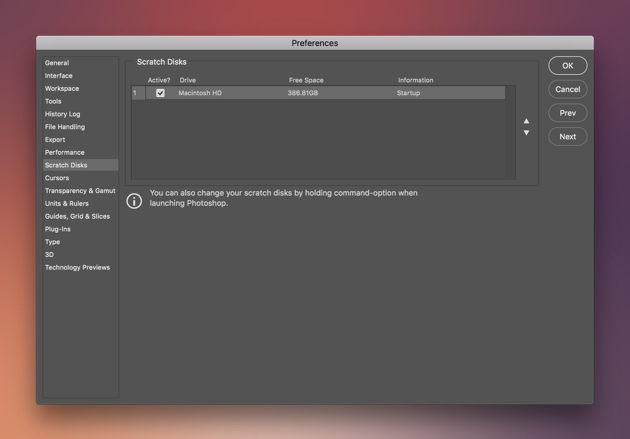
Follow these steps to change your scratch disk in Photoshop:
- Click on the Photoshop menu
- Go to Preferences and then Scratch Disk
- Tick the checkbox to select or remove a drive as the scratch disk
- Click OK
- Restart Photoshop
The 'Scratch Disk Is Full' error fixed!
If you followed this guide there is absolutely no reason why you should ever have to deal with the annoying "scratch disk full" error again. Next time you want to create something amazing in Photoshop, you should experience something new - a Photoshop that runs so smoothly it practically purrs.
Whether you solve the problem yourself or let a great piece of software like CleanMyMac 3 do it for you, just make sure you clean up your scratch disk. Your Mac will thank you for it*.
*Not literally. That would be weird.


0 comments:
Post a Comment